实践教程 | OpenVINO2021.4+YOLOX目标检测模型测试部署

极市导读
本文基于YOLOX的ONNX模型分别测试了YOLOX-Small与YOLOX-Tiny版本的模型。 >>加入极市CV技术交流群,走在计算机视觉的最前沿
引言
前面写过一篇文章介绍了YOLOX目标检测模型,知道它是基于Pytroch而且类似与YOLOv5目标检测模型,文章链接:吊打一切现有版本的YOLO!旷视重磅开源YOLOX:新一代目标检测性能速度担当!
本文基于YOLOX的ONNX模型分别测试了YOLOX-Small与YOLOX-Tiny版本的模型。硬件配置与软件版本:
-
properties
-
Win10 64位
-
CPU CORE i7 8th
-
VS2017
-
OpenVINO2021.4
型号说明
两个模型的输入与输出格式分别如下:

以YOLOX为例,解释输出的内容是什么,看模型的输出图标如下:
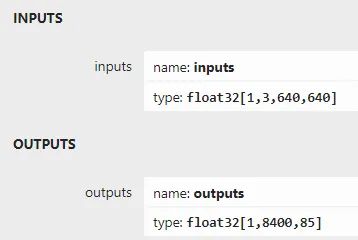
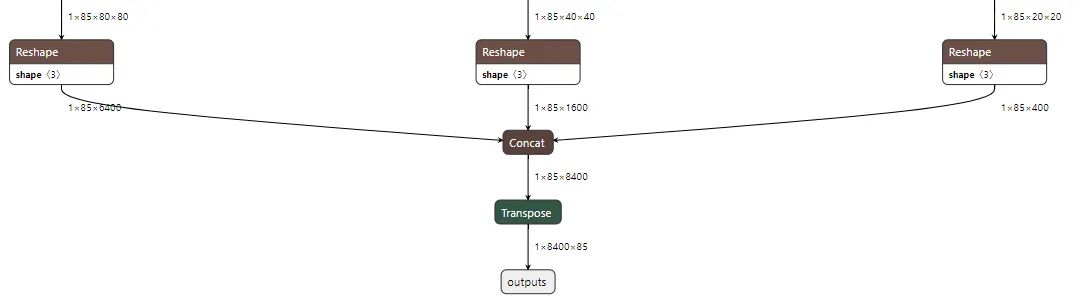
有三个输出层,分别是8倍、16倍、32倍的降采样,输出的8400计算方法为:
80x80+40x40+20x20 = 6400+1600+400=8400
分别6408倍、16倍、32倍的降幅大小。85的前四个是cx、cy、w、h大小,第5个是对象预测评分,80个是COCO类别。
看到这里就知道它跟YOLOv5的解析差不多。然后它对它的预测要求如下:
输入通道顺序:RGB、类型浮点数0~1之间
输入的均值:0.485f, 0.456f, 0.406f
输入的归一化方差:0.229f, 0.224f, 0.225f
代码实现部分
首先需要加载对应模型,从github上下载好的模型ONNX格式文件之后,首先通过IECore来加载YOLOX,代码如下:
std::cout << "YOLOX Demo" << std::endl;
Core ie;
std::vector<std::string> availableDevices = ie.GetAvailableDevices();
for (int i = 0; i < availableDevices.size(); i++) {
    printf("supported device name : %s \n", availableDevices[i].c_str());
}

//  加载检测模型
auto network = ie.ReadNetwork("D:/yolox.onnx");
设置模型的输入与输出,这里需要注意,输入设置为FP32,读取输入与输出层名称,代码如下:
// 请求网络输入与输出信息
InferenceEngine::InputsDataMap input_info(network.getInputsInfo());
InferenceEngine::OutputsDataMap output_info(network.getOutputsInfo());
// 设置输入格式
std::string input_name = "";
for (auto &item : input_info) {
    auto input_data = item.second;
    input_name = item.first;
    input_data->setPrecision(Precision::FP32);
    input_data->setLayout(Layout::NCHW);
}
printf("get it \n");

// 设置输出格式
std::string output_name = "";
for (auto &item : output_info) {
    auto output_data = item.second;
    output_name = item.first;
    std::cout <<"output name: "<< item.first << std::endl;
    output_data->setPrecision(Precision::FP32);
}
下面就是每个输出层的网格,每个网格上的每个点的坐标信息,可以解析数据的时候需要根据索引来获取每个网格的数据
// 生成三个输出层的grid与anchor信息
std::vector<int> strides = { 8, 16, 32 };
std::vector<GridAndStride> grid_strides;
generate_grids_and_stride(IMG_W, strides, grid_strides);
用generate_grids_and_stride省是我例子了官方的代码,这部分我觉得是可以去的,可以从index中直接计算的,也许这样会更快点,暂时我就借了,该方法的代码如下:
const float IMG_W = 640.0f;
struct GridAndStride
{
    int gh;
    int gw;
    int stride;
};

void generate_grids_and_stride(int target_size, std::vector<int>& strides, std::vector<GridAndStride>& grid_strides)
{
    for (auto stride : strides)
    {
        int num_grid = target_size / stride;
        for (int g1 = 0; g1 < num_grid; g1++)
        {
            for (int g0 = 0; g0 < num_grid; g0++)
            {
                GridAndStride gs;
                gs.gh = g0;
                gs.gw = g1;
                gs.stride = stride;
                grid_strides.push_back(gs);
            }
        }
    }
}
下面就很容易啦,创建推理请求,开始执行推理,推理的部分,代码如下:
// 开始推理处理 - 支持图象与视频
cv::Mat image = cv::imread("D:/zidane.jpg");
inferAndOutput(image, grid_strides, input_name, output_name, infer_request);
推断和输出是我的推理与解析输出结果的方法,该方法首先得到输出,然后根据索引从网格_步幅里面查询对应网格的对应位置信息,原来官方的方法比较啰嗦,代码简洁,我很少修改了一下,借助OpenVINO中OpenCV自带的NMS功能功能,重新整理一下,改成现在的方法,发现可以降低量代码,提升神话性,该方法的代码如下:
void inferAndOutput(cv::Mat &image, std::vector<GridAndStride> &grid_strides, std::string &input_name, std::string &output_name, InferRequest &infer_request) {
    int64 start = cv::getTickCount();
    Blob::Ptr imgBlob = infer_request.GetBlob(input_name);
    float sx = static_cast<float>(image.cols) / IMG_W;
    float sy = static_cast<float>(image.rows) / IMG_W;

    // 推理
    blobFromImage(image, imgBlob);
    infer_request.Infer();
    const Blob::Ptr output_blob = infer_request.GetBlob(output_name);

    const float* outblob = static_cast<PrecisionTrait<Precision::FP32>::value_type*>(output_blob->buffer());
    const SizeVector outputDims = output_blob->getTensorDesc().getDims();
    const int num_anchors = grid_strides.size();
    const int num_class = 80;

    // 处理解析输出结果
    std::vector<cv::Rect> boxes;
    std::vector<int> classIds;
    std::vector<float> confidences;

    for (int anchor_idx = 0; anchor_idx < num_anchors; anchor_idx++)
    {
        const int grid0 = grid_strides[anchor_idx].gh; // H
        const int grid1 = grid_strides[anchor_idx].gw; // W
        const int stride = grid_strides[anchor_idx].stride; // stride
        const int basic_pos = anchor_idx * 85;
        float x_center = (outblob[basic_pos + 0] + grid0) * stride * sx;
        float y_center = (outblob[basic_pos + 1] + grid1) * stride * sy;
        float w = exp(outblob[basic_pos + 2]) * stride * sx;
        float h = exp(outblob[basic_pos + 3]) * stride * sy;
        float x0 = x_center - w * 0.5f;
        float y0 = y_center - h * 0.5f;

        float box_objectness = outblob[basic_pos + 4];
        for (int class_idx = 0; class_idx < num_class; class_idx++)
        {
            float box_cls_score = outblob[basic_pos + 5 + class_idx];
            float box_prob = box_objectness * box_cls_score;
            if (box_prob > 0.25)
            {
运行与测试
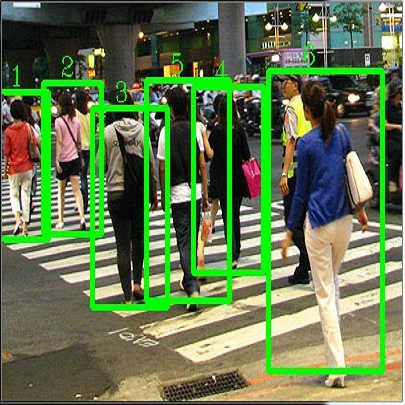
首先用YOLOv5的一张测试一下测试一下,基于YOLOX的小版本模型运行结果如下:
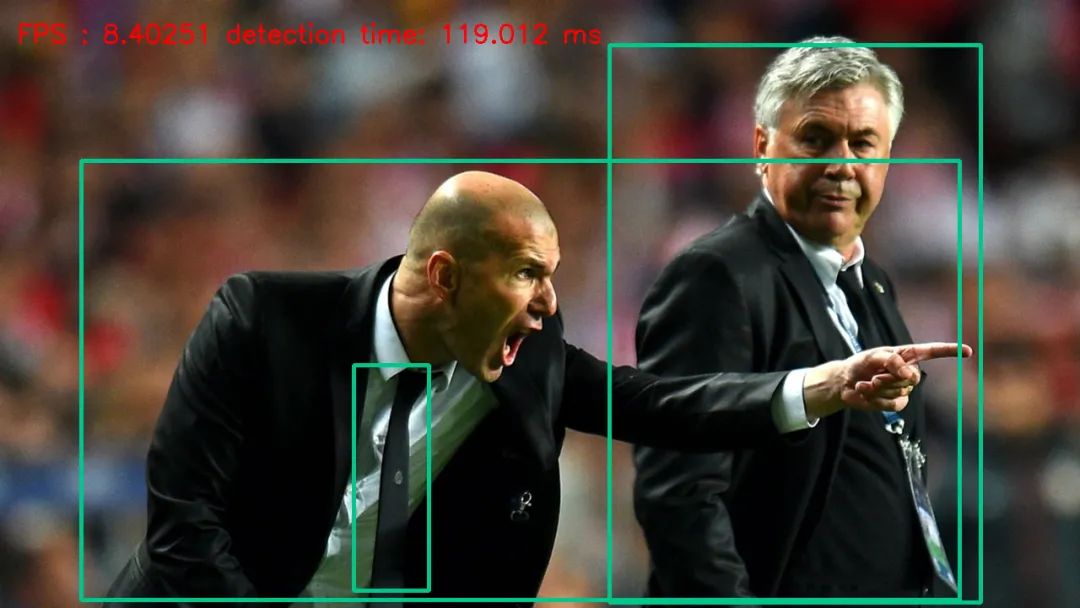
跟YOLOV5小版本测试结果一致,毫无违和感!
视频测试(YOLOX Small版本模型)运行结果如下:
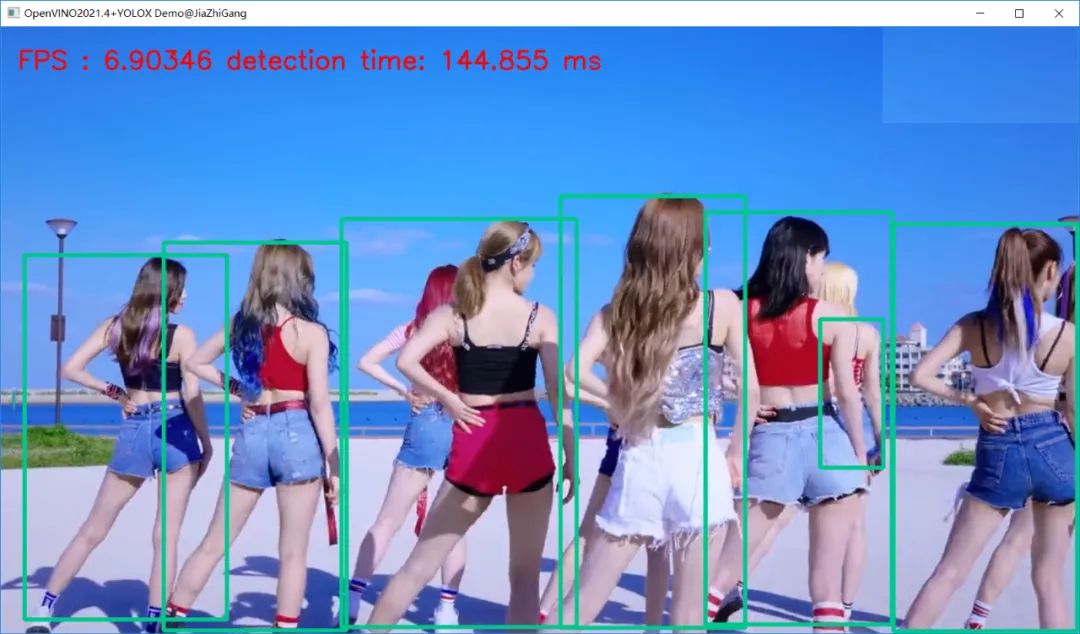
感觉没有YOLOv5的小版本推理速度快(在我的机器上)!还需进一步优化输出解析代码。
视频测试(YOLOX Tiny版本模型)运行结果如下:
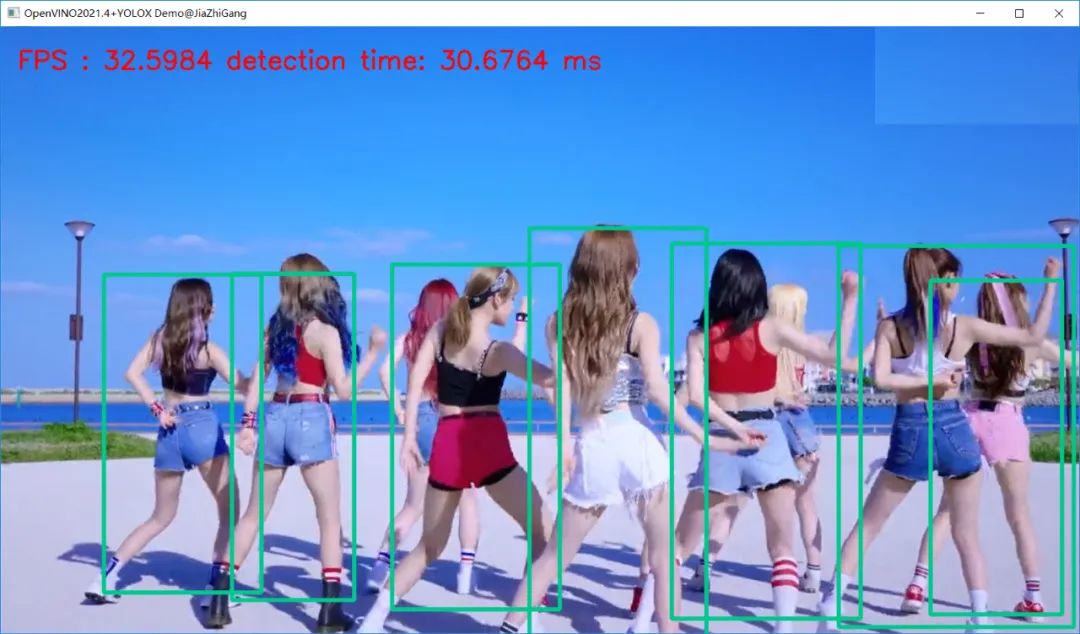
CPU果然可以30+FPS的。
公众号后台回复“数据集”获取小目标检测数据集下载~

# CV技术社群邀请函 #

备注:姓名-学校/公司-研究方向-城市(如:小极-北大-目标检测-深圳)
即可申请加入极市目标检测/图像分割/工业检测/人脸/医学影像/3D/SLAM/自动驾驶/超分辨率/姿态估计/ReID/GAN/图像增强/OCR/视频理解等技术交流群
每月大咖直播分享、真实项目需求对接、求职内推、算法竞赛、干货资讯汇总、与 10000+来自港科大、北大、清华、中科院、CMU、腾讯、百度等名校名企视觉开发者互动交流~